Tag Archives: food

Culinary Adventures #107: Blackcurrant Fool

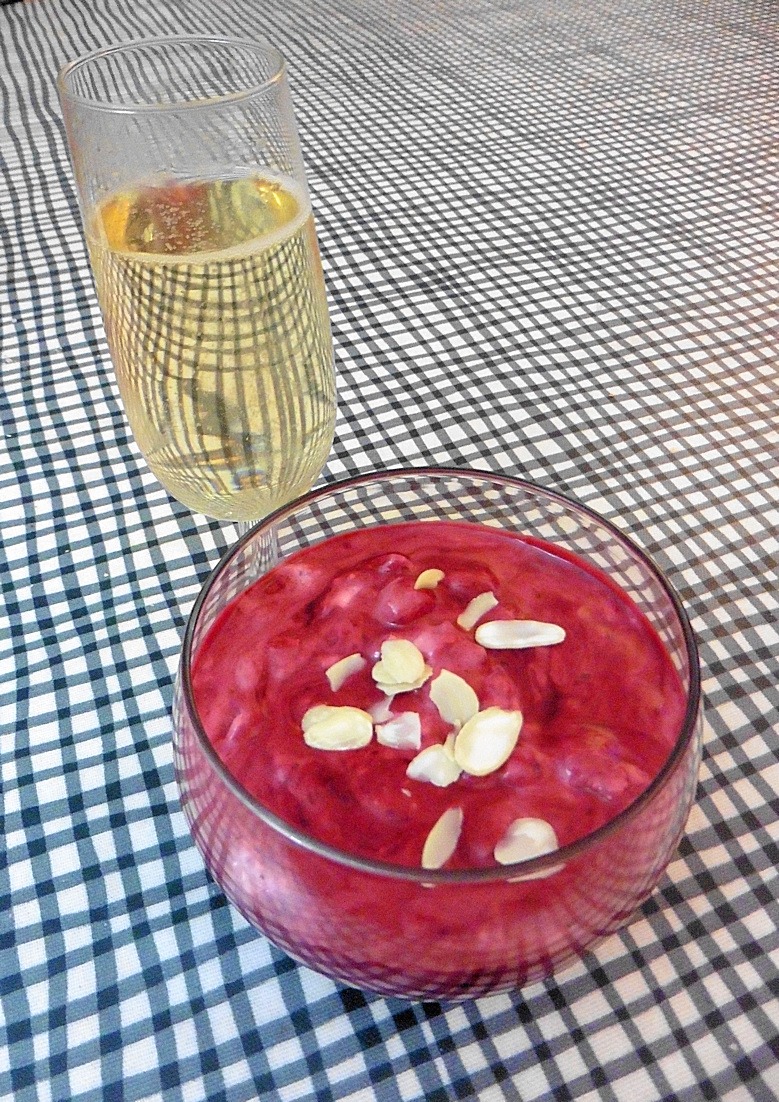
For my recent birthday I tried something I’d not done before and made blackcurrant fool. I don’t do puddings very much due to the need to minimise sugar intake, and I’m not used to mucking about with cream. But I felt like having a go, after all it can’t be hard! Besides we had some blackcurrants taking up much needed space in the freezer. So here it is …

Blackcurrant Fool

Serves: 4-6
Preparation: 15 minutes + cooling + 10 minutes
Cooking: 15 minutes

Blackcurrant Fool

Ingredients

  • 500g blackcurrants
  • 100g caster sugar
  • 300g double cream
  • 250g thick Greek yogurt
  • Splash cassis (optional)

What to do

  1. Simmer the blackcurrants for about 10 minutes with the sugar and a splash of water (or cassis) until the fruit has broken down and the juices have become syrupy.
  2. Sieve to remove stalks, skins & pips; and set aside to cool.
  3. Once the blackcurrant has completely cooled, whisk the cream until soft peaks hold.
  4. Fold in the yogurt.
  5. Then fold in the blackcurrants, and combine – more or less, depending on the level of marbling you want.
  6. Divide into bowls/glasses and chill before serving.

Notes

  1. I’ve adjusted the quantities from what I did as there was too much, too sweet, blackcurrant cf. the cream. While you want something sweet, you also want some sharpness, and don’t want jam. So don’t overdo the sugar.
  2. If you’re using frozen blackcurrants, don’t worry to thaw them. They’ll cook from frozen, although you’ll need to add about 5 minutes to the cooking time.
  3. Don’t waste time removing stalks etc. from the blackcurrants as they’ll get sieved out.
  4. When folding in the yoghurt and blackcurrants, go easy; there’s a fine line between mixing thoroughly and mixing too much. The more you work the mixture the more the whipped cream will break down.
  5. Decorate with some flaked almonds, or a sprig of mint or basil. Serve with wafers or sponge fingers if you wish.

Culinary Adventures #106: Camembert Tartizza

Here’s one I did some days ago. As usual it’s based on a published recipe, but modified.

WTF, I hear you ask, is a “tartizza”? It’s a cross between a pizza and a tart – well I had to find something to call this as it is a sort of a cross between a pizza and a tart.

Anyway, here goes …

Camembert Tartizza

Serves: 4
Preparation: 15 minutes
Cooking: 25 minutes

Camembert Tartizza, fresh from the oven
Camembert Tartizza fresh from the oven & still on its baking parchment

Ingredients

  • Plain flour, for rolling
  • 500g block puff pastry
  • 165g jar Kalamata Olive & Sun-Dried Tomato Tapenade
  • 250g French Camembert
  • 4-6 mushrooms, sliced
  • 2 handfuls cherry tomatoes (halved), or 3-4 tomatoes (sliced)
  • Bunch fresh parsley
  • Black pepper

What to do …

  1. Preheat the oven to 220°C/200°C fan/gas mark 6.
  2. Take a 30cm square baking sheet. Cut a piece of baking parchment a bit bigger than the baking sheet (3cm overlap on each edge is about right). Lay the baking parchment on the baking sheet and using a blunt object (eg. the back end of a spoon) score the parchment into the rim of the baking sheet. (This is to give you the size of the baking sheet.)
  3. Now put the baking sheet (but not the baking parchment) in the oven to heat up.
  4. Roll out the pastry to the size of the baking sheet (it doesn’t need to be neat) and place on the parchment within the marked area.
  5. Gently score round the pastry about 1cm in the from the edge; and prink the middle part all over with a fork.
  6. Spread the tapenade evenly over the pastry, leaving the edges clear.
  7. Cut the Camembert into slices no more than 5mm think, and lay them evenly over the tapenade.
  8. Top with the mushrooms, parsley, black pepper and finally the tomatoes – arrange as you like, random is fine.
  9. Glaze the pastry edges if you wish.
  10. Slide the pastry on its paper onto the hot baking sheet and bake for 20-25 minutes until golden and bubbling – but don’t overdo it as the tapenade will tend to singe round the edges.
  11. Serve cut into portions with a glass of wine.

Notes

  1. This makes a good, warm, supper. Alternatively allow it to cool and cut into finger-food portions as party food.
  2. This would also work with pesto in place of tapenade.
  3. Add garlic, onion, cooked meat, etc. if you wish. But avoid anchovies unless you’re using a non-salty pesto.
  4. If you find the quantity of tapenade is overpowering, just use about half a jar and spread it thinner.

Culinary Adventures #105: Jerusalem Artichoke Soup

Our Jerusalem artichoke plants have done amazingly well. A couple of weeks ago the gardener lifted one of the (dozen or more) plants. This resulted in half a bucket of the best looking, and enormous, tubers I’ve ever seen. (Top tip: don’t lift them until you need them as they don’t store for ever like potatoes.)

As I’ve said before, when I was a kid (in 1950/60s) my parents grew artichokes in a small piece of poor soil and got a reasonable crop. Ours, this year, have been in good soil and well watered so no real wonder they’ve done well. We’ve already decided to grow them again next year.

muddy Jerusalem artichokes

We’ve still not got to the end of this first batch, despite several rounds of roast artichokes (just scrub them, cut them if they’re too big, and roast them in hot oil; no need to cover them, and they’ll caramelise a bit).

As a change I decided to try making soup. As usual with me what I did was a combination of two recipes from the intertubes.

Jerusalem Artichoke Soup

Ingredients

  • At least 500g Jerusalem artichokes
  • 2 tbsp olive oil
  • 25g butter
  • 1 onion, chopped
  • 1 floury potato (about 150g), chopped small
  • 600ml vegetable stock or chicken stock
  • 3 tbsp double cream, plus a little extra to serve (optional)
  • 1 tsp truffle oil (optional)
  • salt and black pepper (to season)

What to do …

  1. Scrub the artichokes well (they’re very good at clinging to mud) and chop into small pieces.
  2. Melt the butter & oil in a large saucepan, and add the onion, potato, artichokes, and some black pepper. Cover the pan and sweat gently for 15 mins, stirring now and again.
  3. Pour in the stock, cover and simmer for another 15 mins until the vegetables are completely tender. If it looks too thick add a few splashes of dry sherry and/or a glass of white wine.
  4. Whizz the soup in a food processor, or with a stick blender, until very smooth.
  5. Return soup to the pan. Add the cream and truffle oil; season to taste with a little salt and more freshly ground black pepper; stir together well and return to a very gentle heat for a couple of minutes.
  6. Serve the soup in bowls, with a swirl more cream and any other topping of your choice (should you wish), and crusty bread.

Notes

  1. When preparing artichokes, look them over carefully and remove any damage. The ends of tubers can rot, and any damaged areas will be discoloured (red/brown).
  2. Another top tip: Despite what a lot of recipes say, do not peel artichokes. If you do they’ll just go to mush; the flesh gets very soft and you need the skin to hold them together (although not such a problem with soup). Added to this they’re knobbly, so a pain to peel as you don’t want to lose a large part of the tuber.
  3. Unless you’re going to cook the artichokes within minutes, drop them in some water (add some lemon juice if you like) as the cut surfaces go brown quite quickly (like apples).

The soup was good and substantial. I think we might do it again.

Culinary Adventures #104: Apples in Nightgowns

This is an old recipe, but one I’ve not tried before. I’m not a fan of the simple baked apple, but I’ve had Apples in Nightgowns in the past (thanks Robert & Theo, wherever you are now) I know how good they can be. So having plenty of apples, a block of pastry and the end of a jar of mincemeat I figured I’d make up my own version.

To get us started, here’s a traditional German recipe. But like most things around here it’s almost infinitely flexible.

Apples in Nightgowns
[Image from the recipe linked above]

Apples in Nightgowns

Serves: 4
Preparation: 20 minutes
Cooking: 40 minutes

Ingredients

  • 4 good sized eating apples
  • 500g block of puff pastry
  • about a tbsp mincemeat for each apple
  • 2 tsp granulated sugar for dusting
  • 2 tsp icing sugar for dusting (optional)
  • flour for rolling
  • milk (or beaten egg) for glazing

What to do …

  1. Pre-heat the oven to whatever temperature the pastry needs, and prepare a baking sheet lined with baking parchment.
  2. Peel and core the apples being sure to keep them whole. If you wish dip the apples in a drop of lemon juice or water to prevent them browning.
  3. Roll out the pastry; it needs to be very thin to be large enough for four apples. Cut the sheet of pastry into four squares.
  4. Place an apple on each square of pastry and fill the core hole with mincemeat; pack the mincemeat in well with the end of a wooden spoon (or similar pusher); it doesn’t matter if it overflows the top.
  5. Wash the pastry with milk (or egg) and wrap it neatly over the apple to enclose it.
  6. Place the enveloped apples on the baking tray; glaze with milk (or egg); and sprinkle with a little granulated sugar.
  7. Bake for 10 minutes at the pastry temperature; then turn the oven down 20°C and bake for a further 20-30 minutes until golden brown and the apple has had time to cook through.
  8. Dust with icing sugar and serve hot or cold with, for preference, double cream.

Notes

  1. As the original recipe implies, you can stuff the apples with almost anything of your choice: fruit & nuts, marmalade, jam, mincemeat …
  2. I used puff pastry because I happened to have some; shortcrust should work just as well.
  3. Traditionally this is made with cooking apples, but they’ll likely need a bit more sweetening than I’ve used here (although the mincemeat was pretty sweet).